
Guest Checkout
Guest Checkout is designed to reduce friction at checkout while still ensuring the capture of customer information so valuable to followup and future marketing.
- Guest Checkout allows new customers to complete an online purchase without needing to create a password.
- The checkout experience is faster and more seamless for the guest, while a customer record is still created in eCELLAR behind the scenes to capture valuable customer data.
- It can be enabled or disabled at any time within the ACP settings, giving full control over when and how it is used.
The Web / Designer Widgets Pathway
- Once product has been added to a cart and Proceed to Checkout is clicked, a log-in prompt appears.
- If the customer is new and does not yet have an account they have the option to Checkout As A Guest.
-
If the email address already exists, the customer will be prompted to log in or reset their password.
(Your designer can alter the text of this form if desired.)

-
Upon clicking Checkout As A Guest a prompt for basic information including first name, last name, and email address will appear.
Note: A customer account is automatically created in eCELLAR using a system generated password.

-
Customer tags are available within the Guest Checkout experience.

-
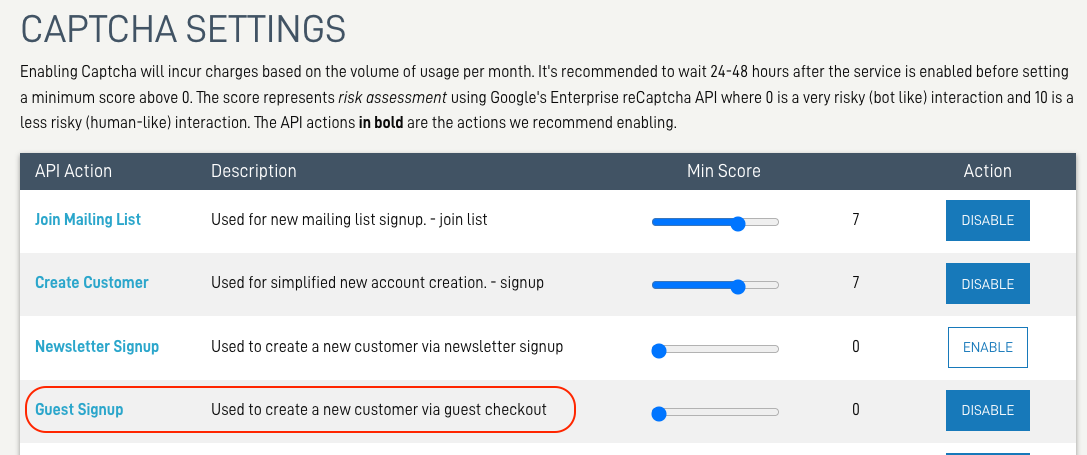
Captcha can be enabled to help protect against spam and fraud.


-
At the end of checkout, the guest has the option to set a password.


Admin Panel (ACP) Setting
Guest Checkout is controlled by a setting in ACP and is defaulted to OFF.
This setting can be found under the Company tab > General Info > Web Settings.

NOTE:
You must enable this setting in order for Guest Checkout to be available on your website.
If you prefer, you can leave this setting turned off.
Email Notification
An Email Notification will be sent to the "Primary Contact" in the Company settings whenever a customer account is created using the Guest Checkout workflow.
The "Primary Contact" address found under the Company tab > General Info > Primary Contact.

For a visual demo of this feature please see this article with a video.