
Inventory Staging and Receiving
Before stocking inventory items into a location, they first must be staged.
Staging allows for bulk additions into a location from an off-site storage facility.
Permission Required: To access the inventory settings, your user account must be enabled with two permissions:
- primary access to the Product menu
- The sub-menu option for Inventory.
Contact your eCellar User Manager for assistance.
To use the Staging/Receiving tools, first set up Source Locations.
These are typically warehouses where post-production new inventory is stored prior to becoming available for retail sales.
To set up a new inventory source, navigate to Products > Inventory > Admin > Sources.
Use the New Source link to create warehouse locations that are not directly tracked for inventory in eCellar.

Inventory Staging
Staging inventory is a list of on-order SKUs that can then be received into a location.
You may want to create a staging order at the same time the transfer request or bill-of-lading is sent to a warehouse.
In the Admin Panel navigate to Products > Inventory > Staging / Receiving.
- Enter the order details and SKUs for Staging:
- SKU(s) to be received
- Source
- Order Date
- Expected Receive Date
-
Order number


As each SKU is added to the staging order, a list will be created in the Receiving section.

Inventory Receiving
- Select the SKU(s) to be received by checking the box on the left.
- Select the units to be received.
- Select the location to which the SKU(s) will be received from the drop-down menu.
- These are the locations that have Inventory checked. See this article for more details on Locations.
-
Click Transfer
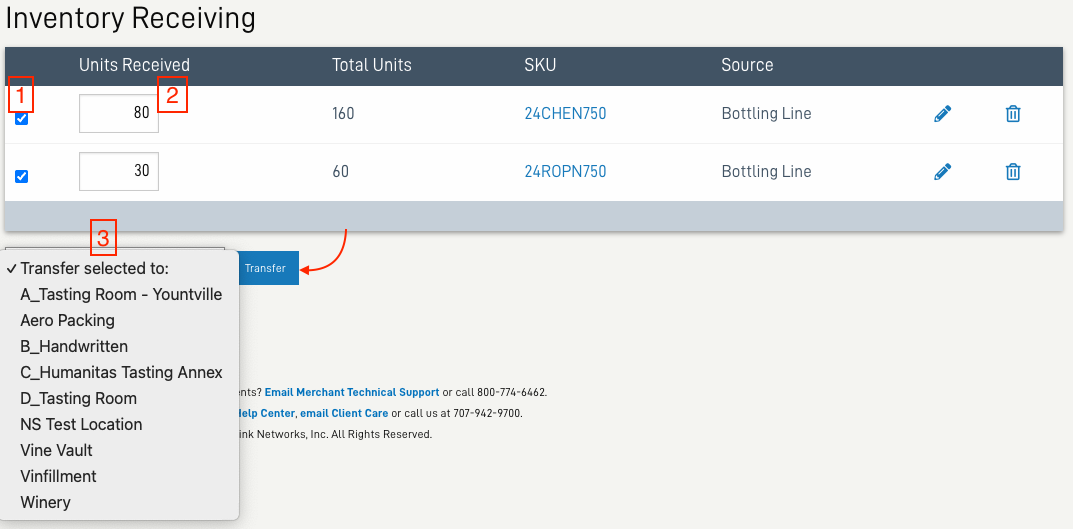
- If only a portion of the total staged is received to one location, the balance will remain to receive to other location(s).
