Inventory Adjustments and Transfers
Adjustments are used to add or subtract inventory counts of a SKU in Available, Invoiced, and On Hand statuses.
Adjustments are usually made at the end of each month to record removal of product that has not been referenced in a sales transaction, or to receive new product into a location from a storage facility that is not tracked in eCellar. (See also Staging and Receiving Inventory.)
Permission Required: To access the inventory settings, your user account must be enabled with two permissions:
- Primary access to the Product menu, and
- The permission to access the sub-menu option for Inventory
Contact your eCellar User Manager for assistance.
Inventory Adjustment
Adjustment Tool
In the ACP, navigate to Products > Inventory > Admin > Adjustments.
This is a blank adjustment page and will require a selection on every field except Reason, though it is highly recommended for accurate tracking.

Adjust Inventory within a Location
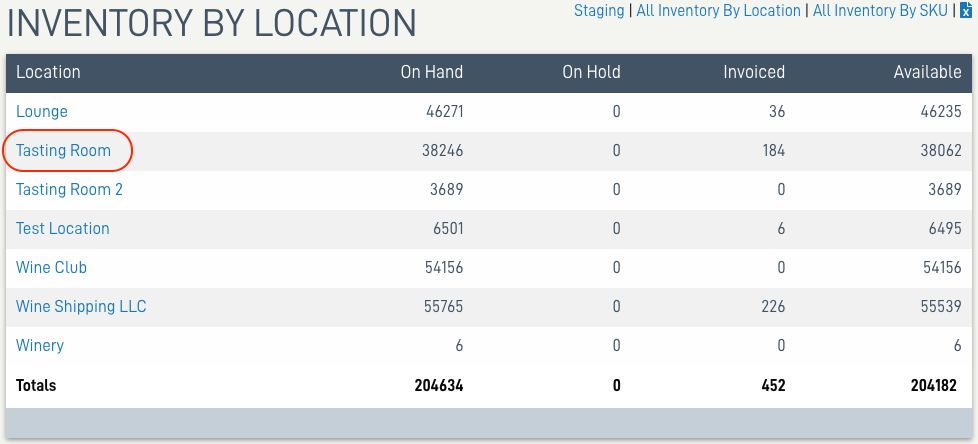
To adjust inventory of a SKU within a location, navigate using the Admin Control Panel (ACP) Toolbar to: Products > Inventory > Show Inventory > By Location.
-
View all Locations, select the desired location.
-
Viewing Inventory in a Location
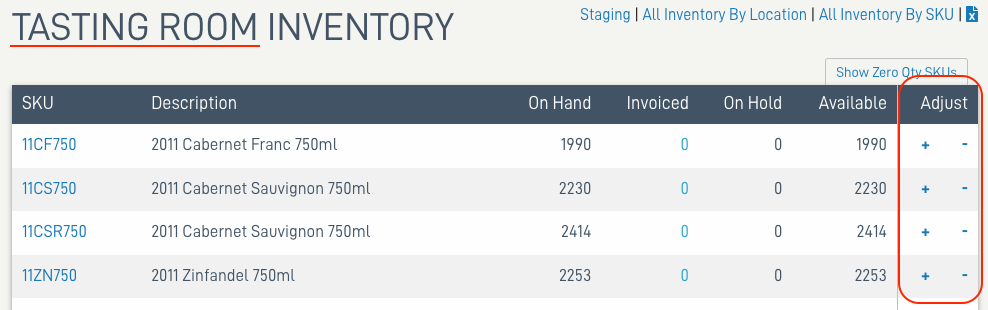
To make an adjustment, use the [+] and the [-] symbols in the Adjust column.
[+] is for a positive adjustment transaction
[-] is for a negative adjustment transaction
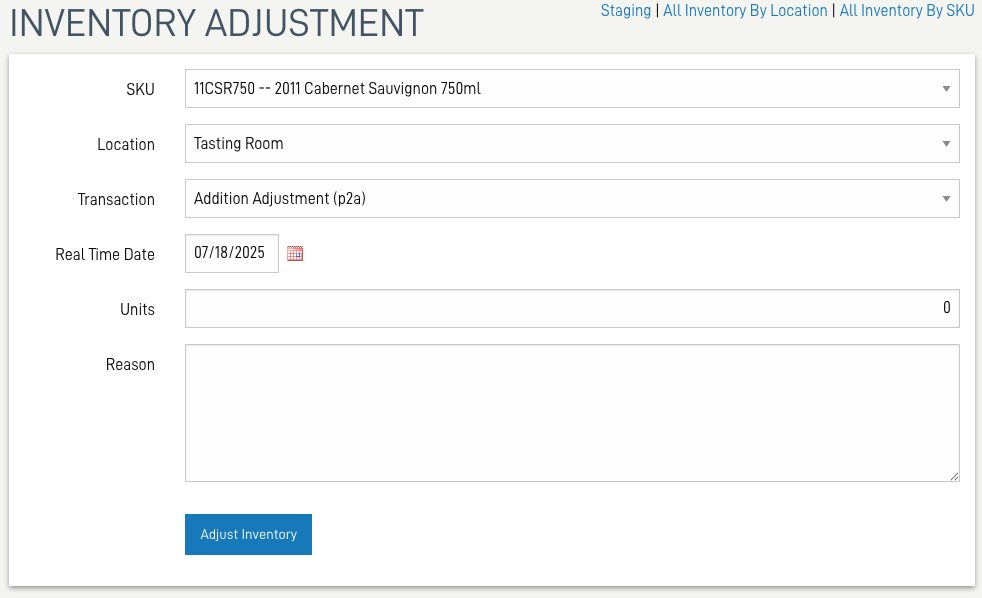
- In the Adjustment page:
- The selected SKU will be automatically populated
- The transaction will default to the addition [+] transaction Addition Adjustment (p2a) or the subtraction [-] transaction reduction adjustment (a2p).
- Enter the Units to adjust in a positive integer. The transaction type will control the addition or removal.
-
Optionally, make a note. Notes can be referenced in a transaction history report, and can be helpful when troubleshooting a mistake or an incorrect month-end reconciliation.
Consult this article for more information about Inventory Transactions.


Inventory Transfer
Transfer Tool
Navigate to Products > Inventory > Admin > Transfer.
This tool is a blank form to select a SKU, to and from locations, quantity of units to transfer.
Each field is required except Reason, though it is highly recommended for accurate tracking

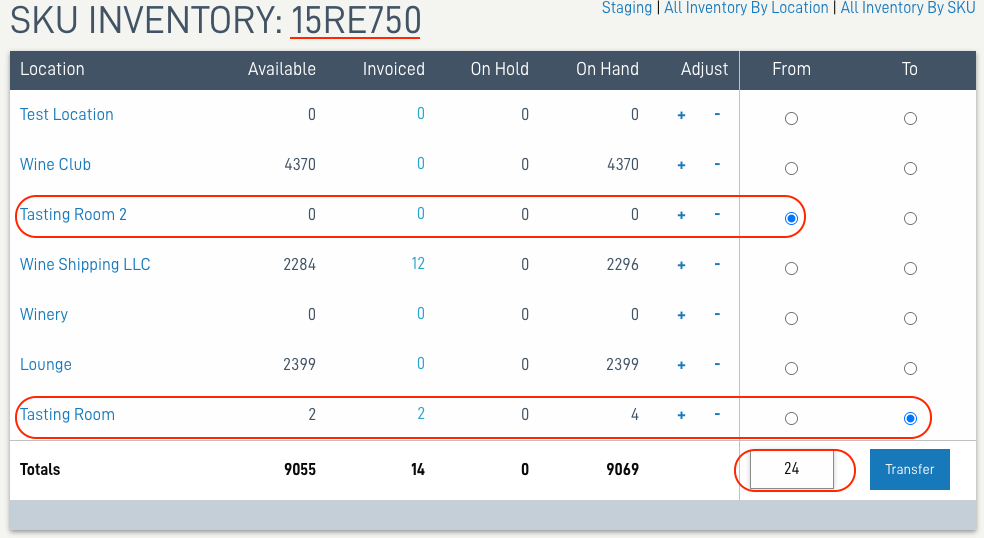
Transfer Inventory within a SKU
- Access the individual SKU:
- Inventory by SKU > individual SKU
-
Inventory > Show Inventory > By SKU
-
Click on the link for the individual SKU

-
Select the From and To locations using the radial buttons, and the quantity of units.
Note: There is no opportunity to add a Reason in the workflow.