
POS - Push Pay
Push Pay functionality that allows clients to “push” unpaid orders to customers for payment at the client’s web site.
In-person Push Pay allows for a touch-less path to purchase when they pay using their own phone.
Push Pay provides a low-friction way to send a non-paid curated order to a customer via email for completion and payment.

Please review this brief blog post to see the purpose and overview of Push Pay before getting started.
Push Pay will work on both registered and virtual terminals.
In this article we will cover:
1. Push Pay Setup
2. Push Pay path to purchase
Push Pay Set Up
Push Pay will work on both registered and virtual terminals.
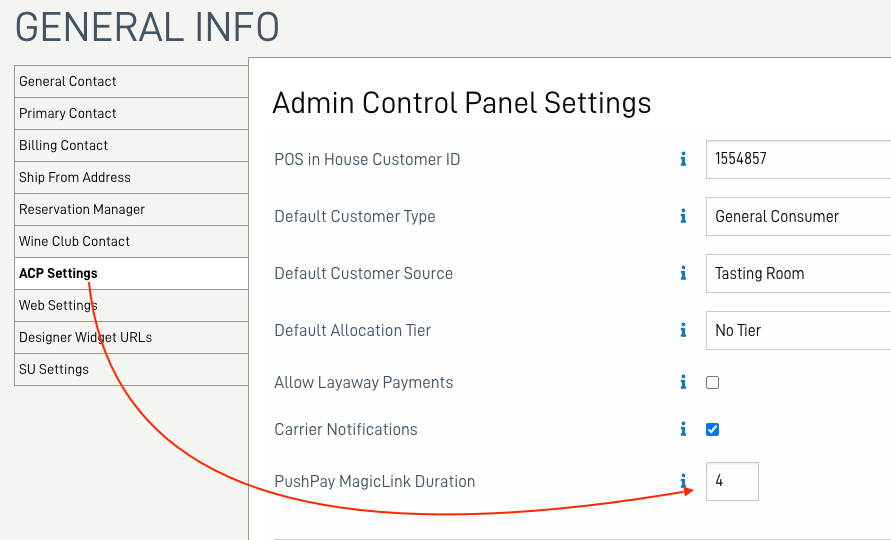
Setting the duration for Push Pay links
SECURITY WARNING:
- Because magic links allow account access without a password, increasing the active window may also increase exposure risk.
- We recommend setting the duration to the minimum amount of time necessary for your specific use case, balancing customer experience with sound security practices.
- eCELLAR will not assume responsibility for misuse of a Push Pay link once it has been issued.
-
In the Admin Panel (ACP) Company Tab > General Info select the ACP Settings sub-tab.
-
Using the arrows, increase the hours to a desired duration of the life of the link.
Values may be entered outside the range, but the following behaviors can be expected:
- if less than 4, 4 hours will be used
- if greater than 24, 24 hours will be used
- if saved as a blank, 4 hours will be used

NOTE: For Enterprise clients, these settings are brand specific.
Push Pay Path to Purchase
- POS Terminals: Mobile and Stationary -
-
1. Assign the customer to the order either via the link from the calendar, or search in POS. - Need to step away? Save the order and a tab will appear at the top of the POS screen.
- Ready to come back to the order? Click the tab with the customer's initials and last 3 digits of the order number.
- 2. Once all the information has been confirmed: product, shipping if applicable, etc, click PUSH.
-
-

-
3. A menu will appear with options to print, email to the customer (confirming the email address), or show QR code on the screen - most often Show QR code will be chosen for POS terminals.
-

-
- 4. A QR code will appear on the screen for the customer to scan. Also, a print icon appears to print the QR code on the receipt.
- 5. Ask the customer to open the camera on their phone, then turn the screen to face the customer so they can scan the QR code.
- The customer will be shown to the order in their fully secure account where they can add a tip (if that feature is turned on for the terminal), change or add a payment method (credit card), and add a note before clicking Complete Order.
-


-

-

-
-
-
- Virtual Terminals
-
1. Search for the customer in the POS - 2. Create the order adding the desired products(s)
- 3. Once all the information has been confirmed: product, shipping if applicable, etc, click PUSH
- 4. A menu will appear with options to print, email to the customer (confirming the email address), or show QR code on the screen - most often Email a Magic Link... will be chosen for virtual terminals
-

-
- 5. The customer will receive an email to complete the order -
-

-
- Clicking the link will take them to the order in their account on the winery web site -
-

-
-
The tip feature is optional. For details about the tip feature see this article.
-
-
-
-
-
Best Practice: If Reservation Manager is used, collect credit card and email information when making tasting reservations, or as part of your Booking Agent. This article contains details on setting up Booking Agents.


The tip feature is optional. For details about the tip feature see this article.


