
Custom Club
Custom Club Set-up
A Custom Wine Club refers to a select group of customers assigned to a custom tier(s) who periodically receive automatic shipments of specific wine varietals. This is designed for those winery customers who are attracted to a club but want a more specific selection. The winery designates how often the shipments occur and what wines are offered, based on the product type selected in each subscribers account.
Custom Shipment Events are used to create and process a batch of orders all at once; allowing you to quickly capture large volumes of revenue via bulk auth/capture.
Those customers in a Custom Club Tier will receive a custom shipment of wine during each Wine Club Shipment Event. The Shipment Event has a specified processing date, includes the products to be shipped and the assigned tier of customers.
Custom Club Shipping Rates do not use the club shipping rates tables. Custom Club pulls from the daily retail shipping rates used when orders are created in the POS. This is due to the variability of each quantity of wine within each custom account. Custom Club pulls from the daily retail shipping rates used when orders are created in the POS.
Overview of Steps:
- 1
- Create Custom Club Tier(s)
- 2
- Create Product Type(s)
- 3
- Build Shipment Event(s)
- 4
- Create Shipment Event Invoices
- 5
- Auth/Capture funds
- 6
- Club Order Management (Compliance, Fulfillment, etc)
- 1 Create Custom Club Tiers:
- 2 Club Product Types:
- 3 Build Custom Shipment Event:
-
7.a. Product: Use the drop-down menu to select each product - type to search -
7.b. SKU: This is auto populated by the selected product
- 7.c. Product Type: Use drop down menu (populated from product types created in above #2)
- 7.d. Price Each: Add the Retail Price, or the override price for club
- 7.e. Discount: Apply a discount if applicable (Customer Type discounts are not automatically included in club batch orders).
- 7.f. Max Quantity: Enter the number of bottles. This is the maximum number of bottles that will be shipped for this event
- 7.g. Taxed: Select if this product is taxable
- 7.h. Free Shipping: Applies free shipping by product, not the entire order or club event.
- Click Add Product after each new product is entered
- Click Save Shipment
-
If you make a mistake and need to change a product or product setting:
- Use the Trash Can to delete the line item, and begin again by selecting the desired product type and product
- Use the edit pencil to make changes to an existing shipment product -

-
- Preview Club Shipment: Club > Shipments > Click Preview Icon (Eyeball)
-
This allows you to proof through all customers assigned to this Shipment Event
Tip: To check for any errors, confirm your order count by comparing Active Members in Club Shipment View to the number of orders to be generated in the shipment preview page
Tip: You can filter this list by error type to streamline your workflow -
 (last names are grayed out to protect identities)
 -
1. This tool validates that a billing address, shipping address and credit card are linked to the club subscription and there are no missing data points. These are required for order generation. Any records that have address or credit card errors will appear in red noting the particular error.
*Since custom club does not look at the wine club shipping rates the ‘Ship’ column will be highlighted in red. This is okay!To Filter by Error Type: Click [Select an Option] to choose a filter for the list. If you are subscribed to the Card Updating service, then expired cards are not important to review right now
-
Click Filter Results
-
Note: This view is also sortable by the column title, with or without other filters applied.
- 4 Create Shipment Event Invoices:
- You have confirmed your Invoice Creation Date
- Your Shipment is marked > Active
- You have double checked the Shipment Event (products, prices, discounts, quantity and tax. Remember the club inserts too!)
- You have previewed your Shipment Event and made any corrections
-
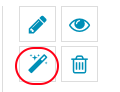
From the Club Shipments view, select the Wand icon in the Functions tools. This will create individual orders for each member of the assigned tier.
Use the Admin Control Panel toolbar to navigate to the Club menu. To review all club tiers and edit existing or add new tiers, go to: Club > Tiers >.
Tip: It’s helpful to write out a list of all your club types with a brief description. If you have many clubs, this can serve as a checklist as you create each new Tier in eCellar.

1. Tier Name: This should be a very brief title. Examples: Zinfandels Only, Owner Friends and Family, Classic Cabernets (12 bttls)
2. Public Tier Name: This often mirrors the Tier Name. Keep in mind it is visible to your customers
3. Display Order: This is for specifying the order that tiers will appear in when shown in lists (for customers to select from).
4. Description: Describe the club shipments/specifications (will be visible on your website)
5. Public Signups: Select if you want to allow new potential club members the ability to join the club online through the "Join a Club" page
6. My Account Signups: Select if you want to allow current mailing list members the ability to join the club online through the “My Account” page

7. Custom Tier: Check this box

7.a. Minimum Bottle Quantity: (Optional) Will control if a minimum bottle purchase is required when signing up, and the quantity thereof
7.b. Minimum Annual Spend: (Optional): This ties to the Estimated Price per Club Product Type
For example:
Product type #1: Qty 3 x Est. Price $50 = $150 +
Product type #2: Qty 3 x Est. Price $75 = $225
= $375 Annual Spend
If $400 was entered in this field, the customer would have to add additional product(s) to their selection
7.c. Allow Member Edit: If checked, the customer can edit the quantity for each (not hidden) product type in their subscription
Click [Submit] to complete this Tier
DESIGNER WIDGETS SIGNUPS -
- These are only used in the public Join a Club when a NEW customer is being created
- For the pathway My Account > Join a Club, these are ignored
- They are optional: If they are not selected, then the similarly-named settings in Company Info are used
New Customer Source: This is tied to Customer Sources and will be reflected on the Customer Card > Customer source

New Customer Type: This is tied to Customer Types and will be reflected on the Customer Card > Customer type

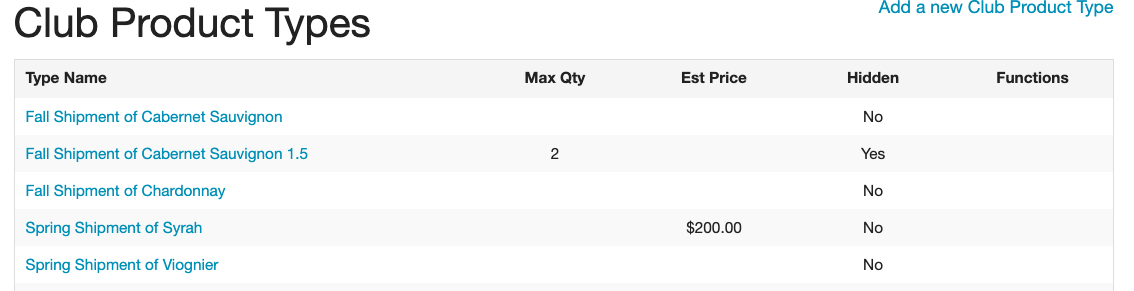
Use the Admin Control Panel toolbar to navigate to the Club menu. To review all custom club product types and edit existing or add new product types, go to: Club > Product Types
Note: This is the general product type, not the specific vintage

1. Name: A brief title. It can be generic - Club Cabernets, or more specific as in the screen shot above
2. Hide (box): When checked, this club product type will NOT be visible to consumers when they sign up or edit their subscription. Nor will it appear in the ACP customer card > club subscription editor
DESIGNER WIDGETS SETTINGS -
3. Max Qty Allowed: (Optional) Consumers can choose up to this amount when signing up or editing their subscription. If left blank, consumer may enter any number
4. Estimated Price: (Optional) If specified, this will be used in combination with Club Tier > Minimum Annual Spend to enforce the minimum spend
Click [Save] to complete this Product Type
Use the Admin Control Panel toolbar to navigate to the Club menu. Club > Shipments > Add a new Club Shipment, choose Create Custom Shipment

1. Event Name: Brief descriptors that indicate the timing or vintage of the event and the group to which it is sold; such as "20FL_Cabernet Club Custom" or "Friends and Family Selection v17"
2. Club Tier: Select the dropdown menu one of the tiers previously designated as Custom
3. Invoice Create Date: The date orders/invoices will be created. NOT the date credit cards will be charged.
4. Active: This must be 'turned on' to test your event, and to go live.
5. Internal Description: {your preference} Not visible to customers
6. Pick Up Location: From the options in the Company tab > Location
Hint: Save Shipment at this point, then come back and add products (in case you are interrupted).
7. Products: Select Add a Product
NOTE: If mistakes occur once orders are created they must be edited individually to make any corrections.


 (last names are grayed out to protect identities)
Club > Shipments
Tip: Make sure your members’ suspend start-date is BEFORE your Shipment Event date. If the suspend begin date is after your Shipment Event date, an order will be created. Best practice is to make the begin hold date the first of the month, and the suspend end date the last day of the month.
IMPORTANT: Invoice Creation Date is the date you are creating invoices, not charging (auth/capturing) orders
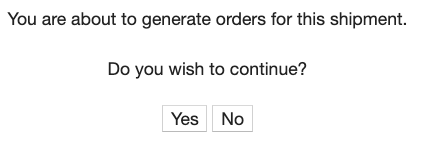
You are ready to create orders IF:
-
Confirm you’re ready to create orders. Remain on the same page until your results populate.
- 5
- Auth/Capture funds
- See Help Doc titled " Club Batch Settlement "
-
- 6
- Club Order Management (Compliance, Fulfillment, etc)
- See Help Doc titled "Club Order Management"
-
-
-
Pay close attention to the shipment event results, and review that all counts are accurate.
IMPORTANT: Do NOT navigate away from the club generation page while orders are being created. This process could take several minutes depending on the size of your club. You will see an "Order Generation Results" page when all orders have been created. Wait for this screen before using any other application on your computer.

To review and interact with the results: Club > Settlement