
Connecting Card Readers for Use - Mobile POS Terminal
This article will cover the M2 and S700/S710 set up for a mobile POS station using the eCELLAR iOS app and an iPad.
Note: To perform this action your user account must be enabled with the permission for POS > Terminal Admin. If you do not have this permission, contact your winery's eCELLAR User Manager for assistance.
You will need:
- A POS terminal ready to use for the transactions. See this article for more information.
- Well charged card reader device (M2 or S700/710) and iPad.
- The version 1.6.1 (9/18/2026) of the eCELLAR iOS app loaded on the iPad.
- A valid credit card.
M2 Device Set Up for a Mobile POS Terminal
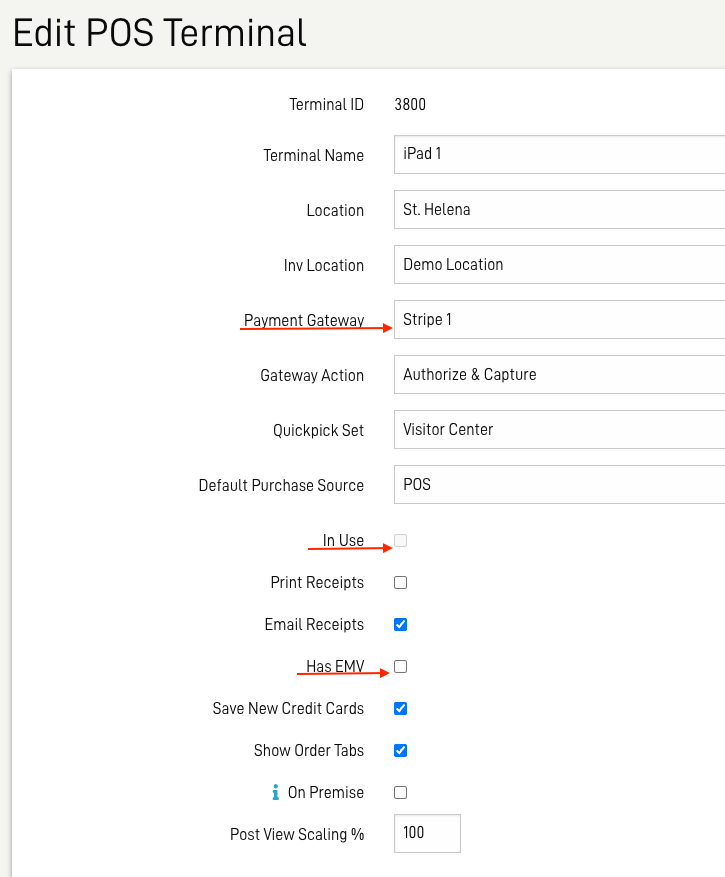
- From POS > Terminal Admin, select the terminal you will be using by clicking on the linked terminal name. In Edit the POS ensure the following:
- Payment Gateway: A Stripe Gateways is selected.
- In Use: is NOT checked.
- Has EMV: Is NOT checked.
-
Click SAVE.
- Register the terminal
- POS > Manage
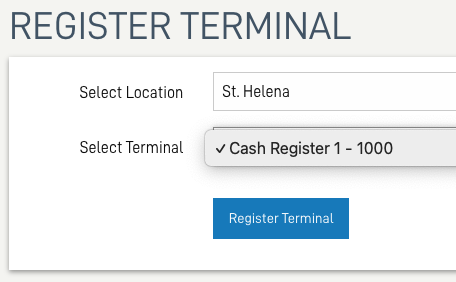
- Select the location and the terminal from the drop-down menu , click Register Terminal.
- A message will appear that the terminal has been activated on the computer.
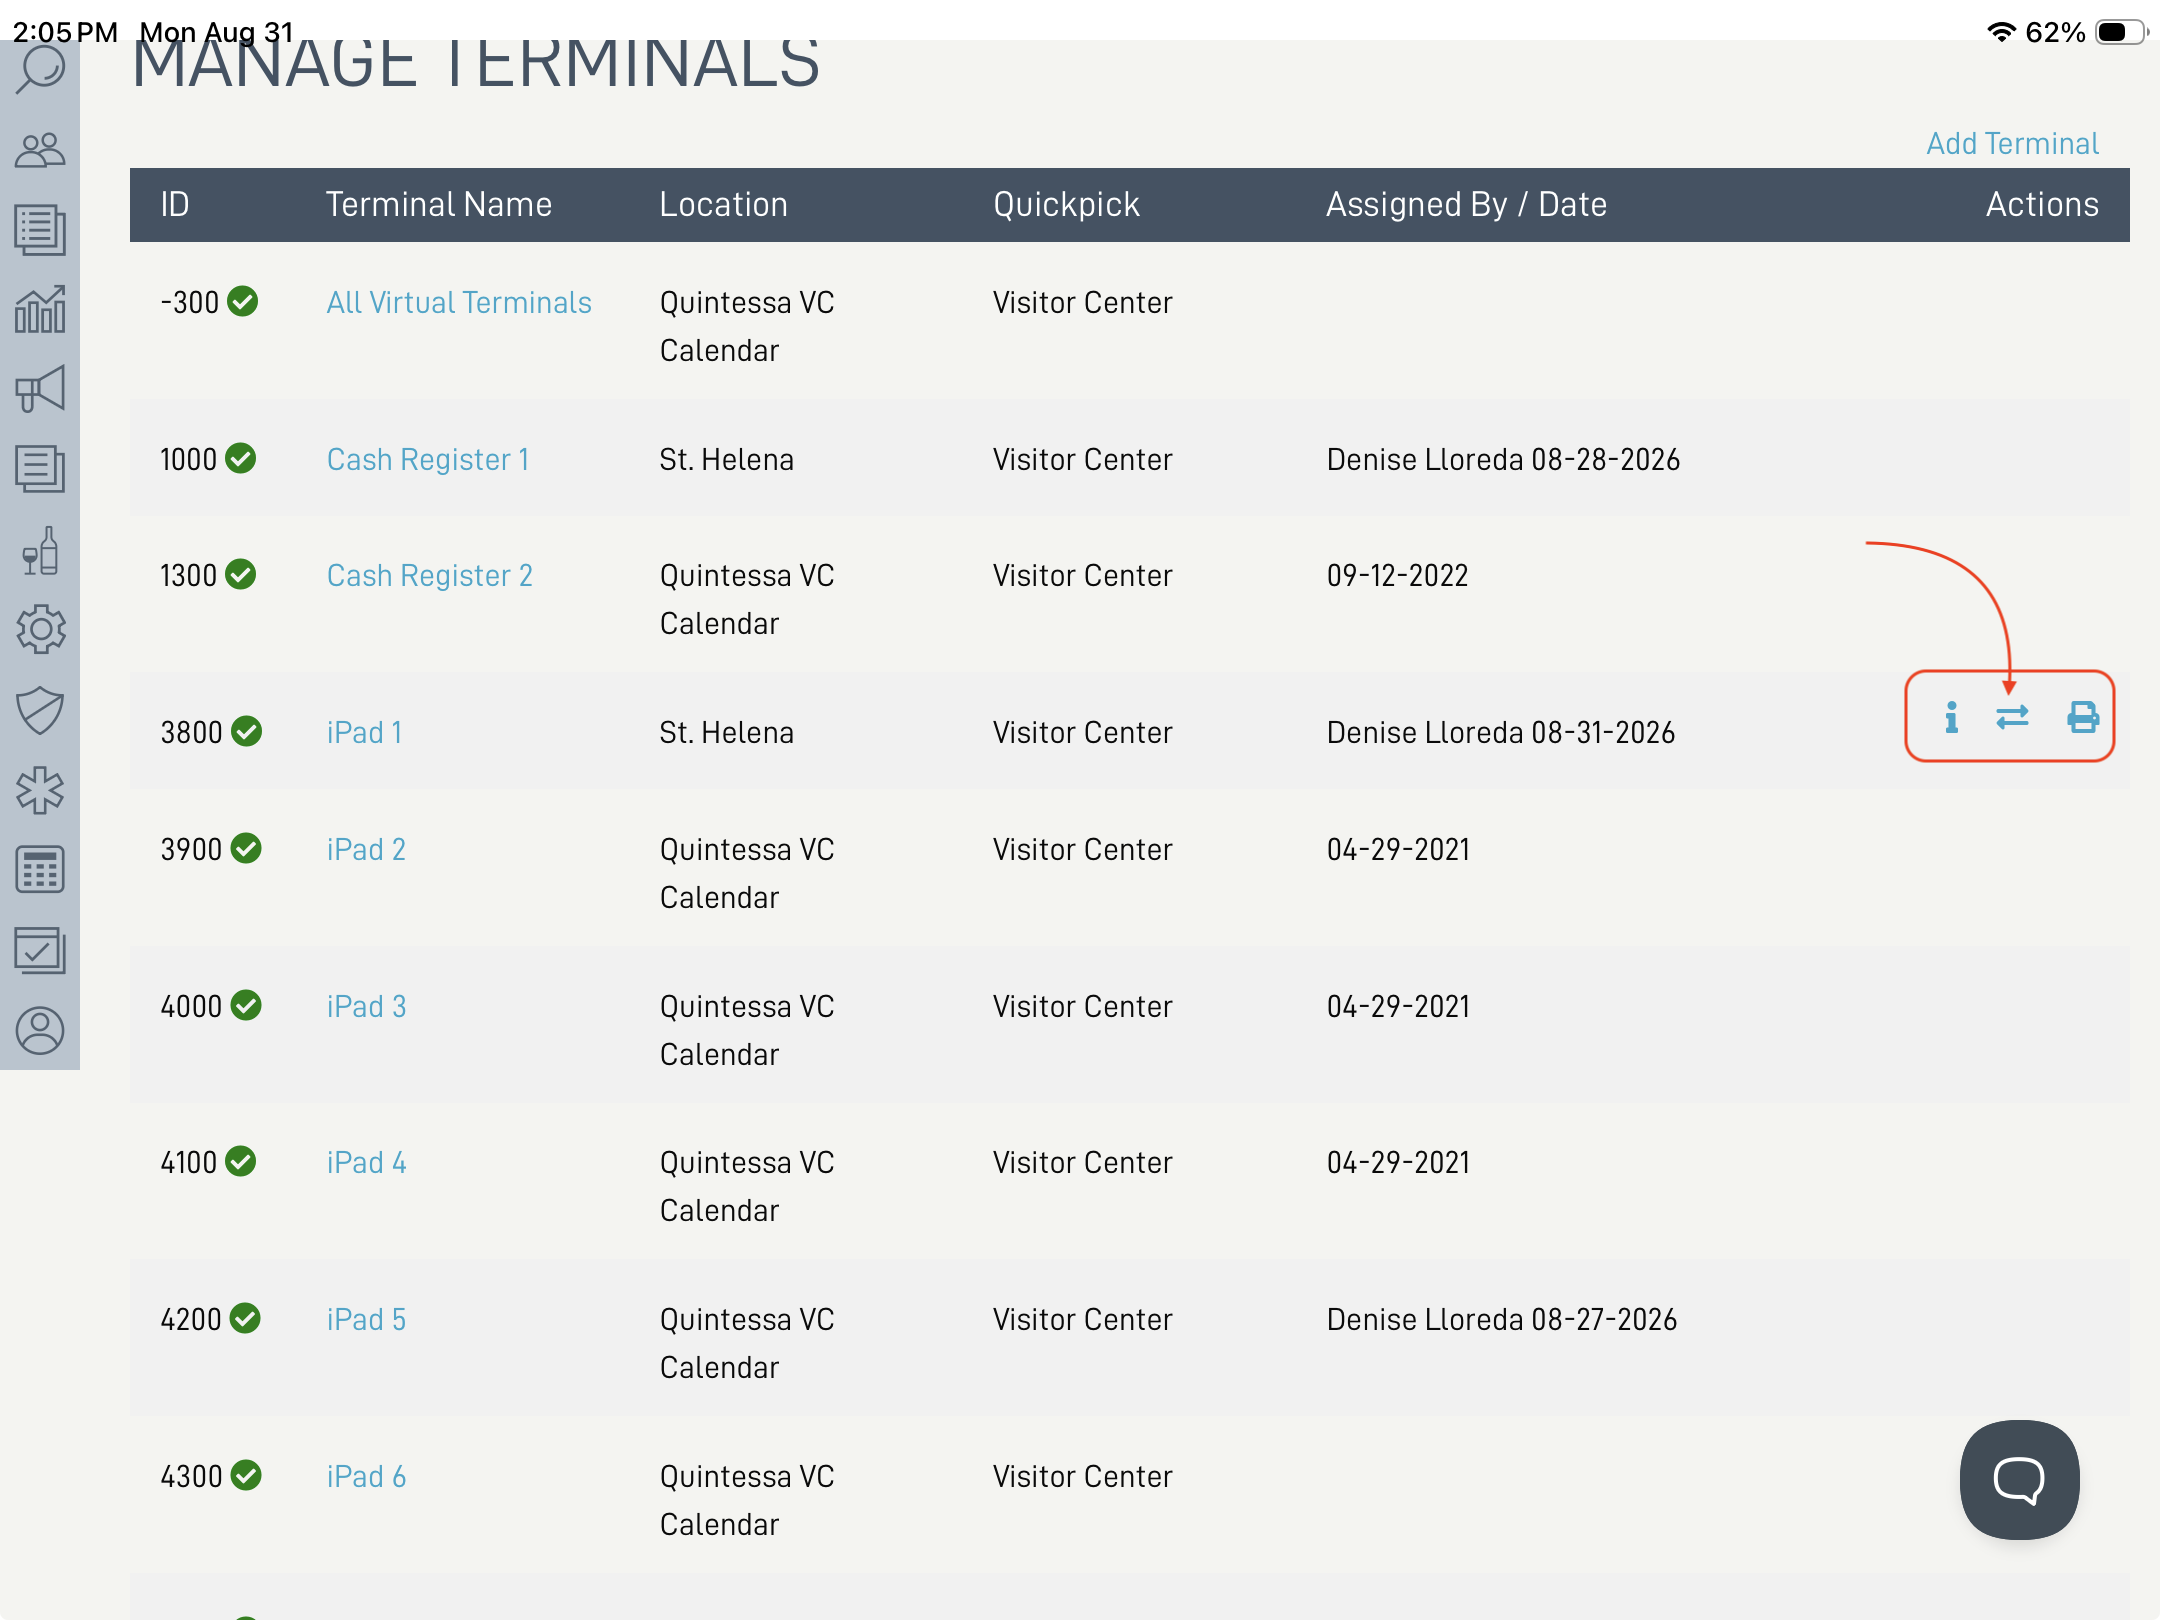
- Go back to POS > Terminal Admin
-
There will now be some icons. Click on the opposing arrows to pair the M2 device.
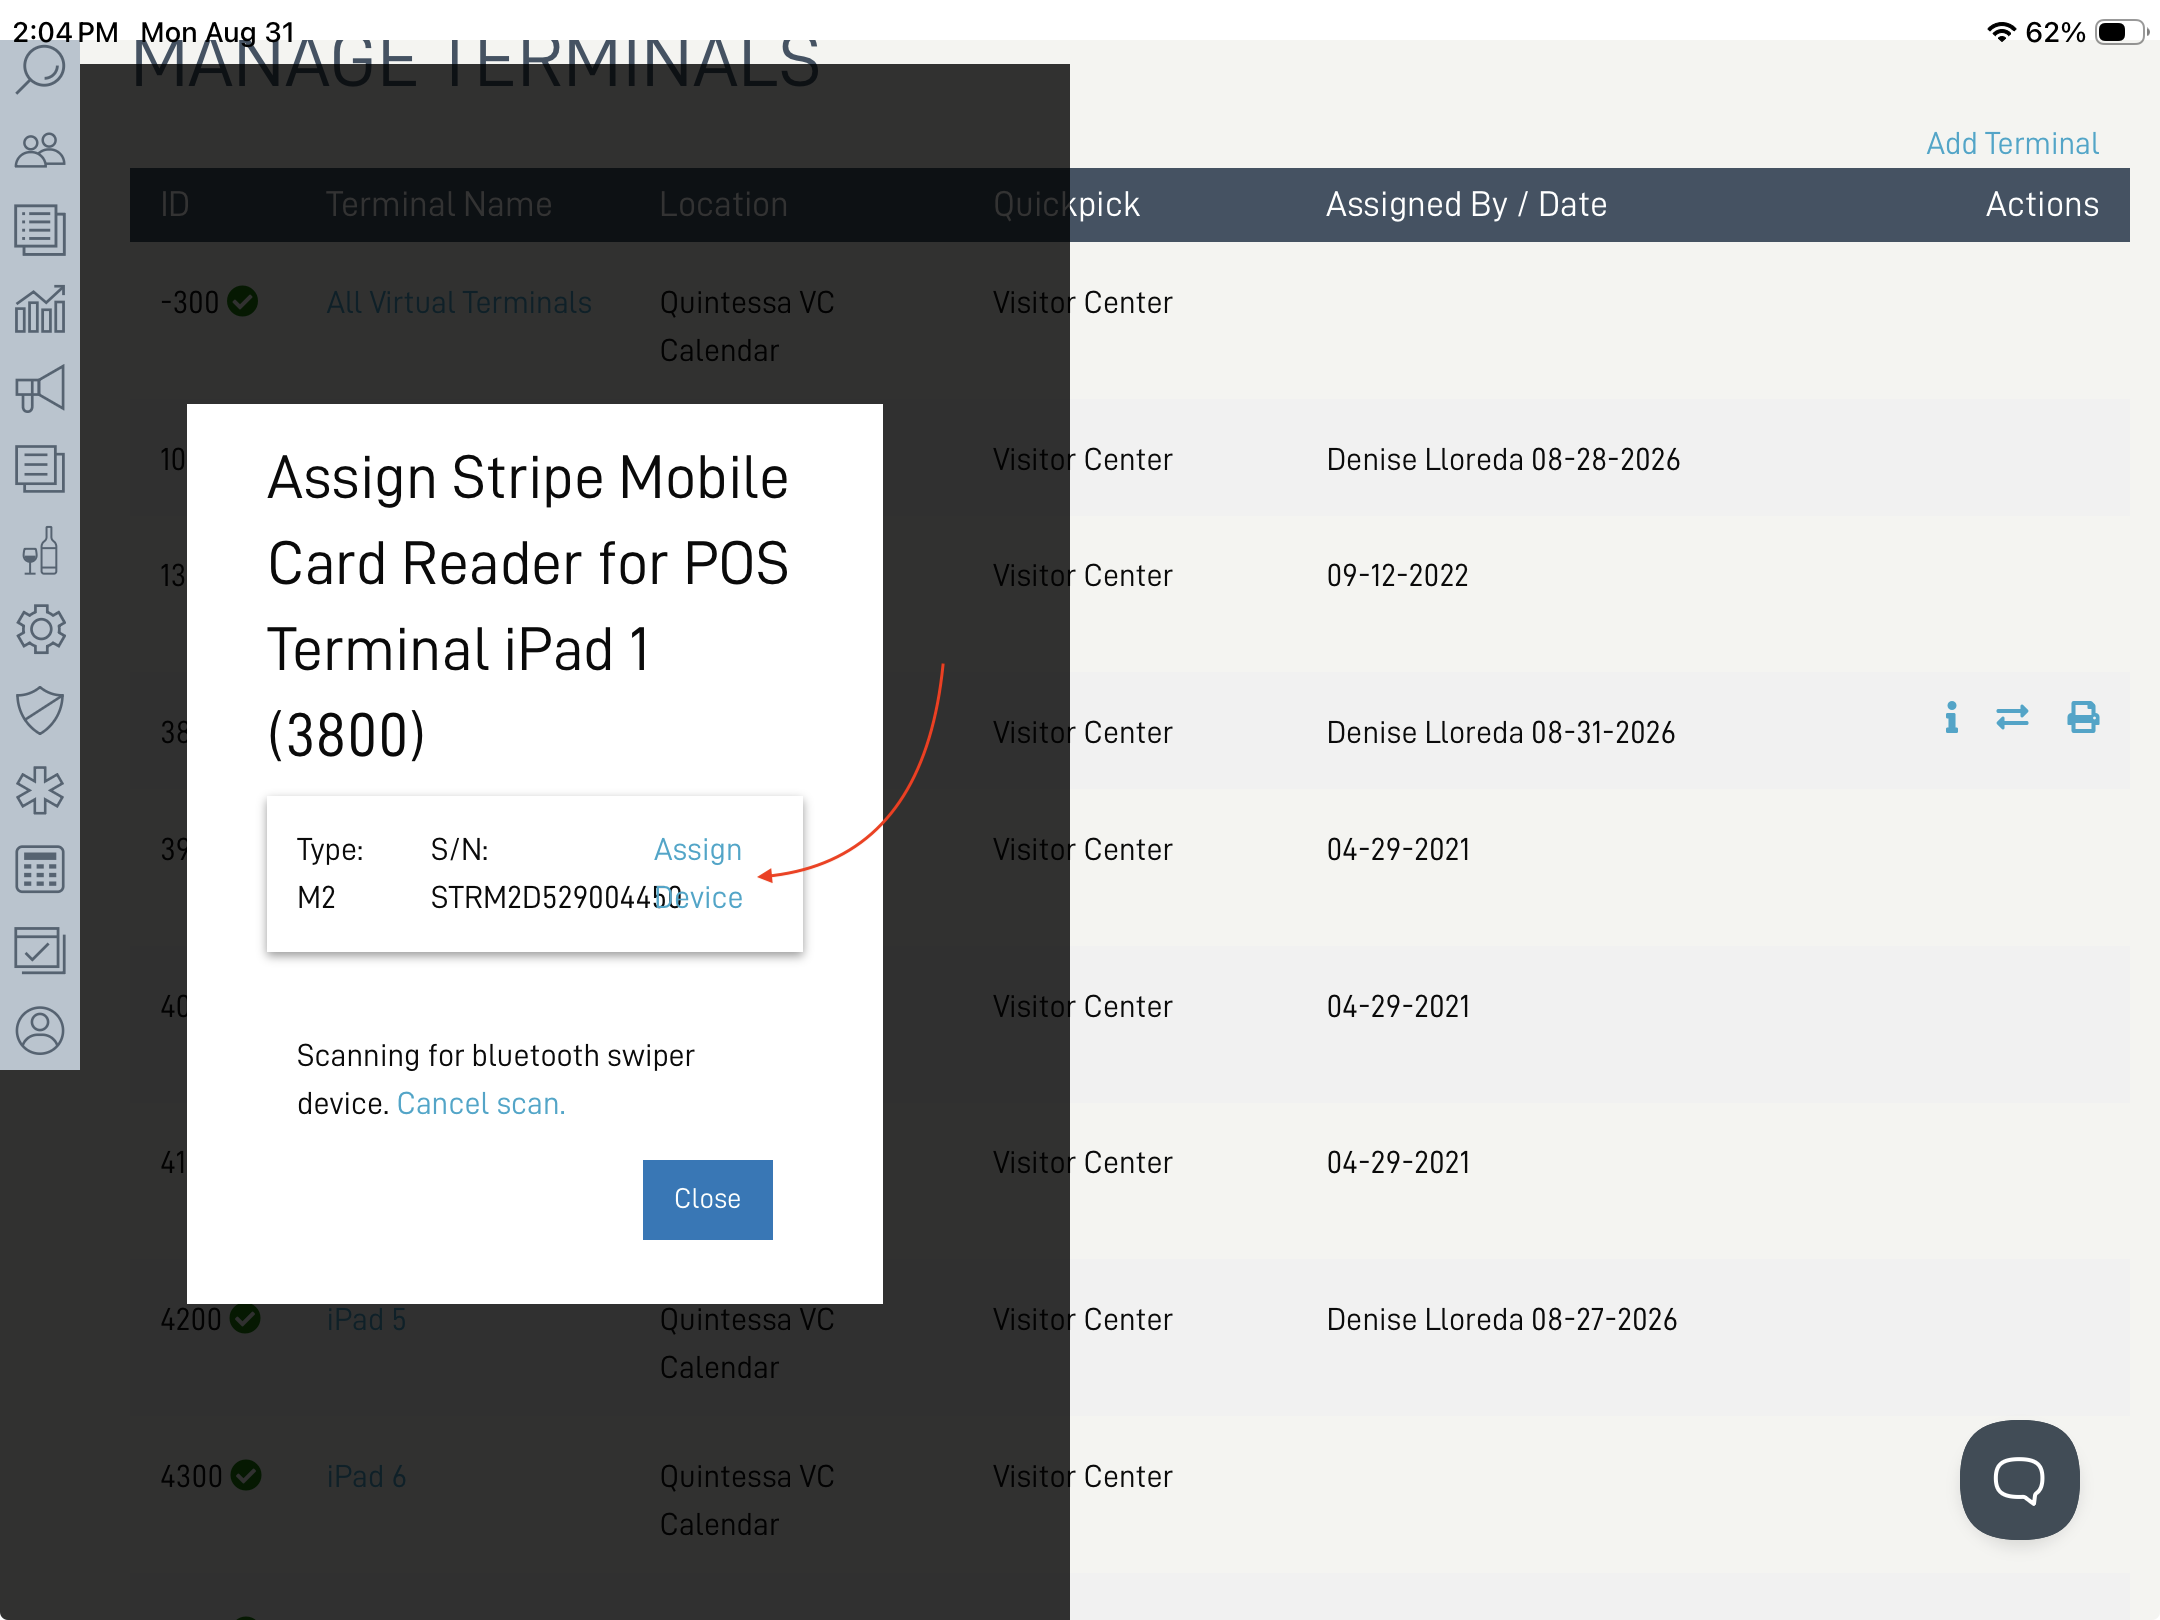
- Click Assign Device.
- You may get a verification to use Blue Tooth; confirm While Using the App.
- The lights on the device will flash in quick succession and you will hear a beep when it is paired.
- Click Close.
-
- Open the POS (you may have to close and open "the till", simply click the close and open buttons).
- You are ready to process payments!
- Place a test order, voiding it immediately after review.
S700/S710 set up for a Mobile POS Terminal
In the Admin Panel (ACP), select POS > Terminal Admin, and click on the terminal to Edit the POS Terminal.
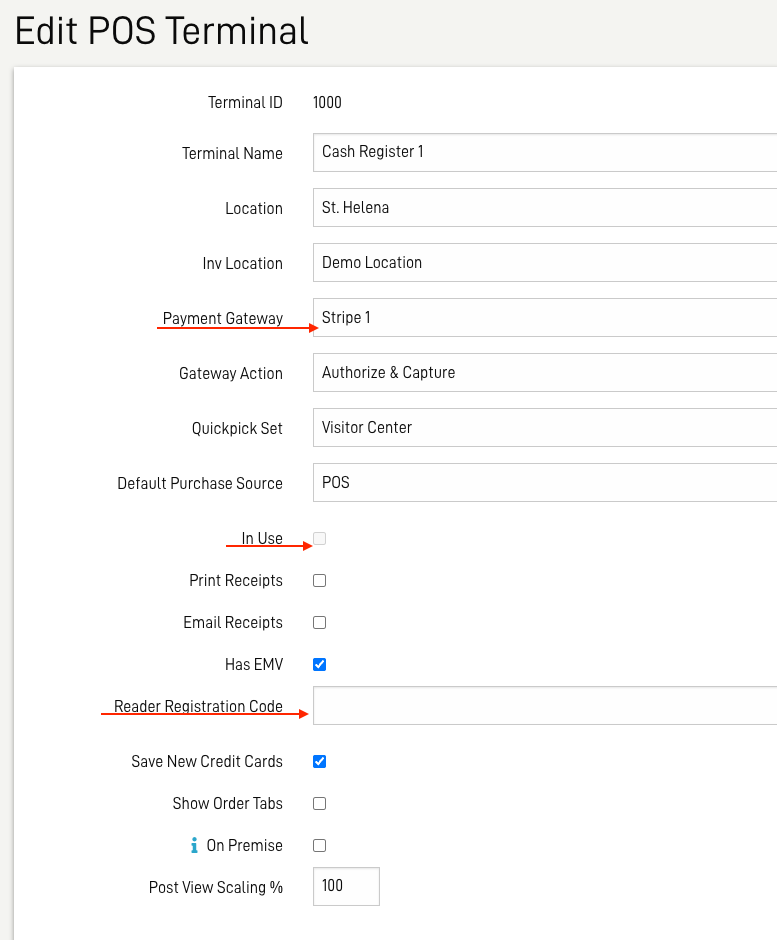
- Ensure the terminal has been released: In Use unchecked.
- Confirm a Stripe Payment Gateway is assigned.
-
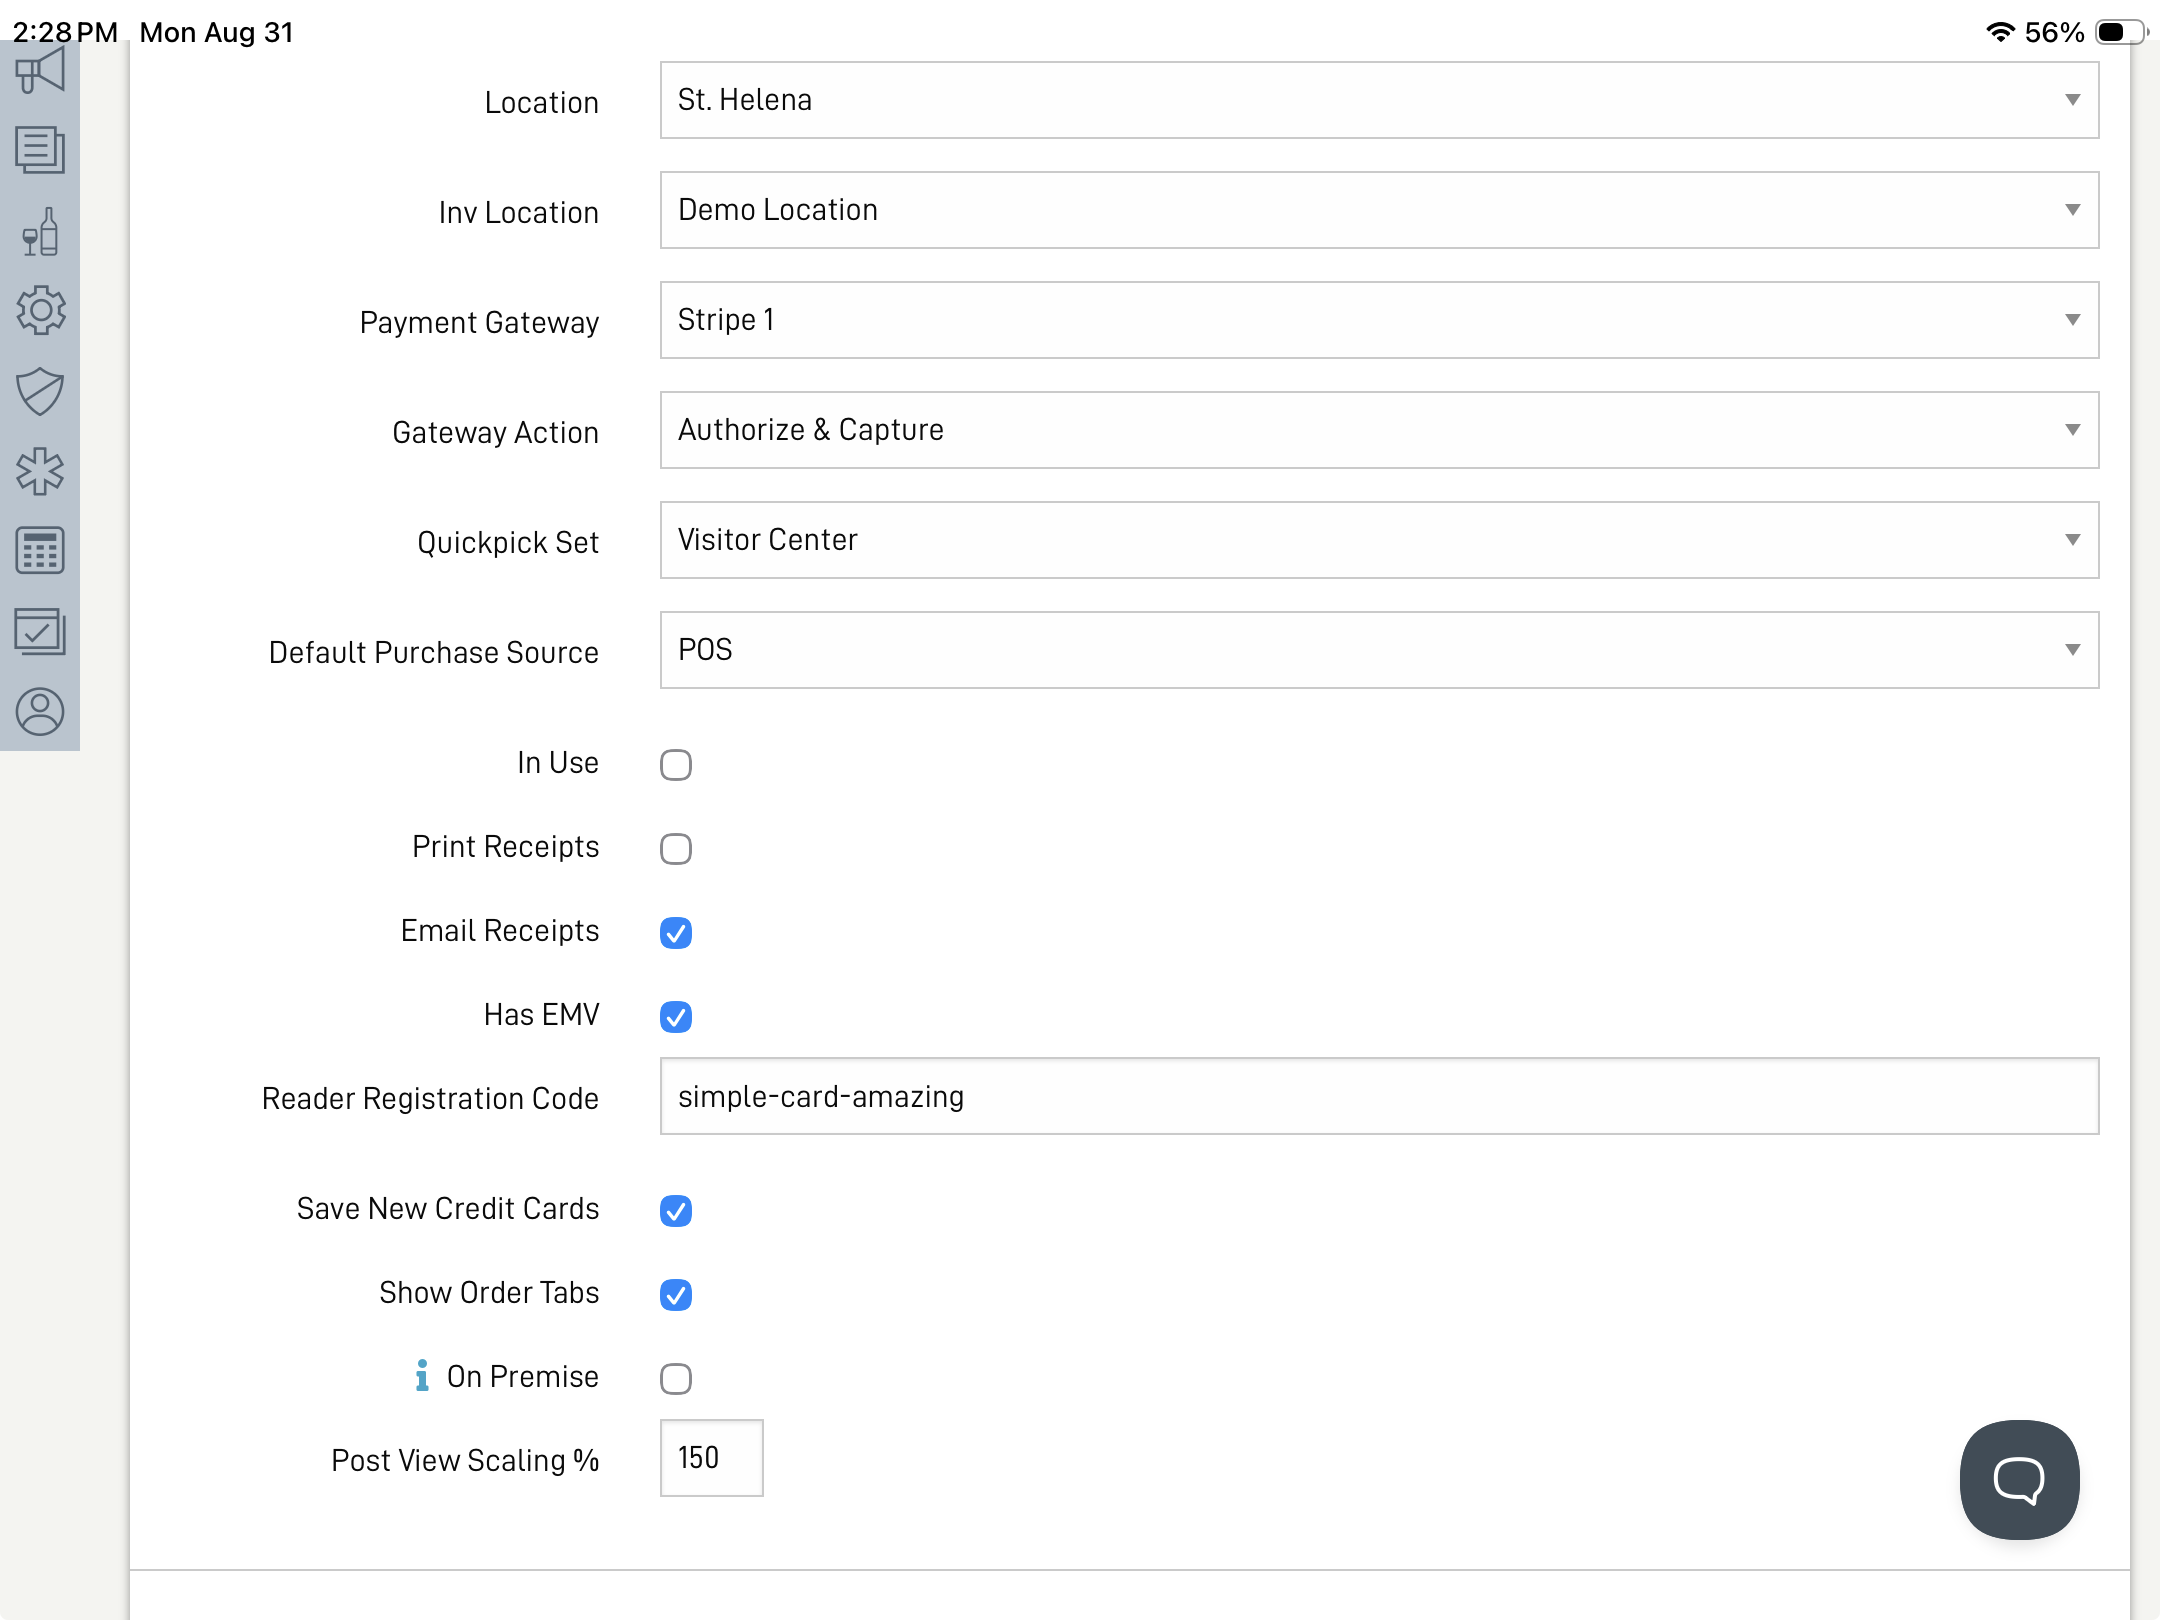
Check Has EMV. This will open a field to enter a Reader Registration Code.
-
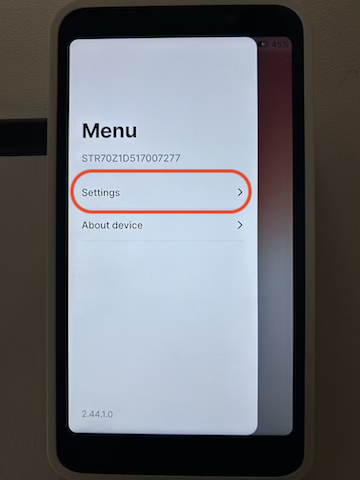
On the S700/S710 device swipe left to reveal the Menu. Select Settings.
-
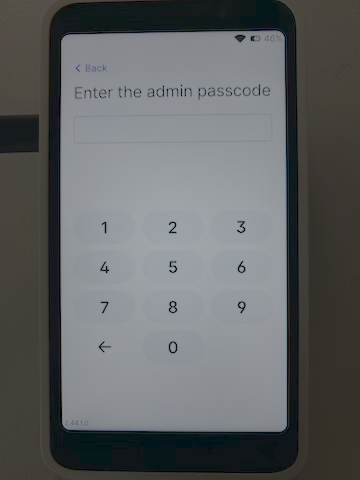
Enter the Admin Passcode 07139 to access the Admin Options.
-
Select Generate paring code
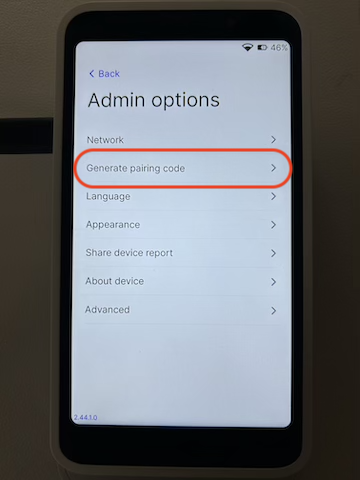
- Enter the code exactly as presented into the field in the POS terminal detail, all lower-case. Click save.
-
The screen on the device will reset to the eCELLAR logo indicating it is ready for use.
-
-
Register the terminal: POS > Manage, select the location and the terminal, click Register Terminal. You will get a confirmation message.

- Open the POS it is ready for use. (you will need to close and open "the drawer".)
- You are ready to process payments!
- Place a test order, voiding it immediately after review.